
You may need to add a graphics file to your LaTeX source. LaTeX provides highly sophisticated ways of achieving that and Texifier supports them in new innovative ways. Live typesetter TexpadTeX will even typeset your document with these images into PDF shown in the in-build viewer live as you type the in the editor.
Required Commands & Packages
To typeset with images in either Texifier iOS and macOS, you must use a graphics package, e.g. graphicx (added to your LaTeX source using the usual \usepackage{graphicx} command, see package documentation on CTAN \includegraphics{...} to add an image to your LaTeX source.
So to include an image saved as file my-image.png, we would simply write the following LaTeX code,
\documentclass[11pt]{article}
\usepackage{graphicx}
\begin{document}
...
\includegraphics{my-image.png}
...
\end{document}
.png in the \includegraphics command. Other typesetters such as pdfLaTeX may differ, with standard practice being omitting of the extension.Where to Save an Image File
The image file my-image.png in the above example would be expected to be residing either in the same directory as the .tex file that includes it, or in a folder that is on the typesetter’s search path.
It is best practice to store all of the includes of a project in the parent folder of the root .tex file, or in a subfolder under the parent folder. This makes the project easy to move as a whole as the paths to these image files can be entered in \includegraphics command relative to the root .tex file. When the project folder moves to a new location, paths of all the image files stay constant as they are relative to the project folder.
For an image file to be used in your LaTeX project, it must be saved to the same storage as the .tex files of the project. This is because the storages such as local (named iPad or iPhone in Texifier iOS), iCloud, etc. are isolated and projects in one storage may not access files across the storage boundary. The current file storages are as follows,
In addition to being required to be in the same storage, certain storages may have further restrictions,
iCloud, Files Shared by Other Apps and Files on Connected Storages: A project in one linked folder is not allowed to access images outside of the linked folder in which it sits. All project subfiles including images files must reside in the same linked folder.
Connect: Each Connect project is self-contained unit and
.texfiles in a project may only access files in the same project.
Importing Images into Texifier
Images taken from the Camera or previously stored in the Photo Library on iOS must be stored in one of the storages before a LaTeX project can make use of them.
There are three ways to import images into one of Texifier’s storages for use in your .tex files.
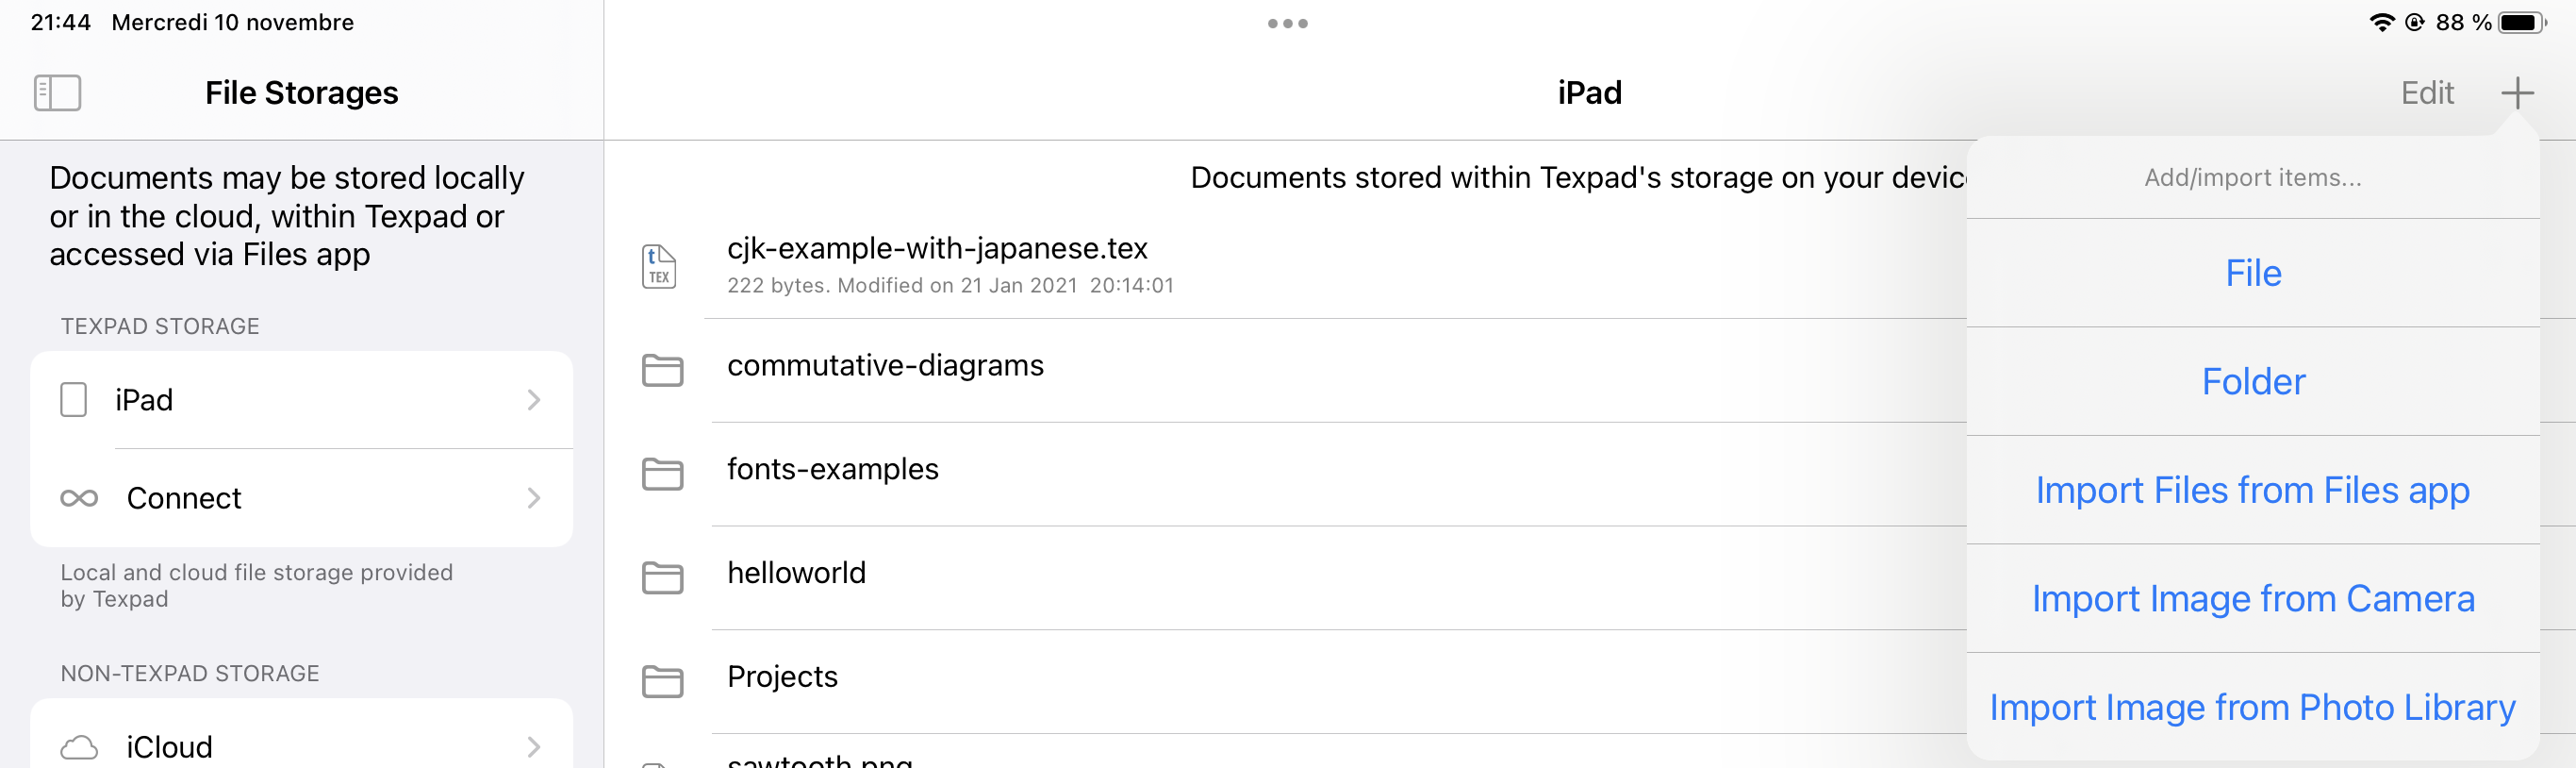
Using Documents’ Pane in Texifier
In the Documents’ pane, folders across all storages have an add button

Using these options will store the image you select to import in the current folder.
From within an Project Workspace in Texifier
On iPad, the workspace of an open project has its own add button
In the Documents’ pane, folders across all storages have an add button
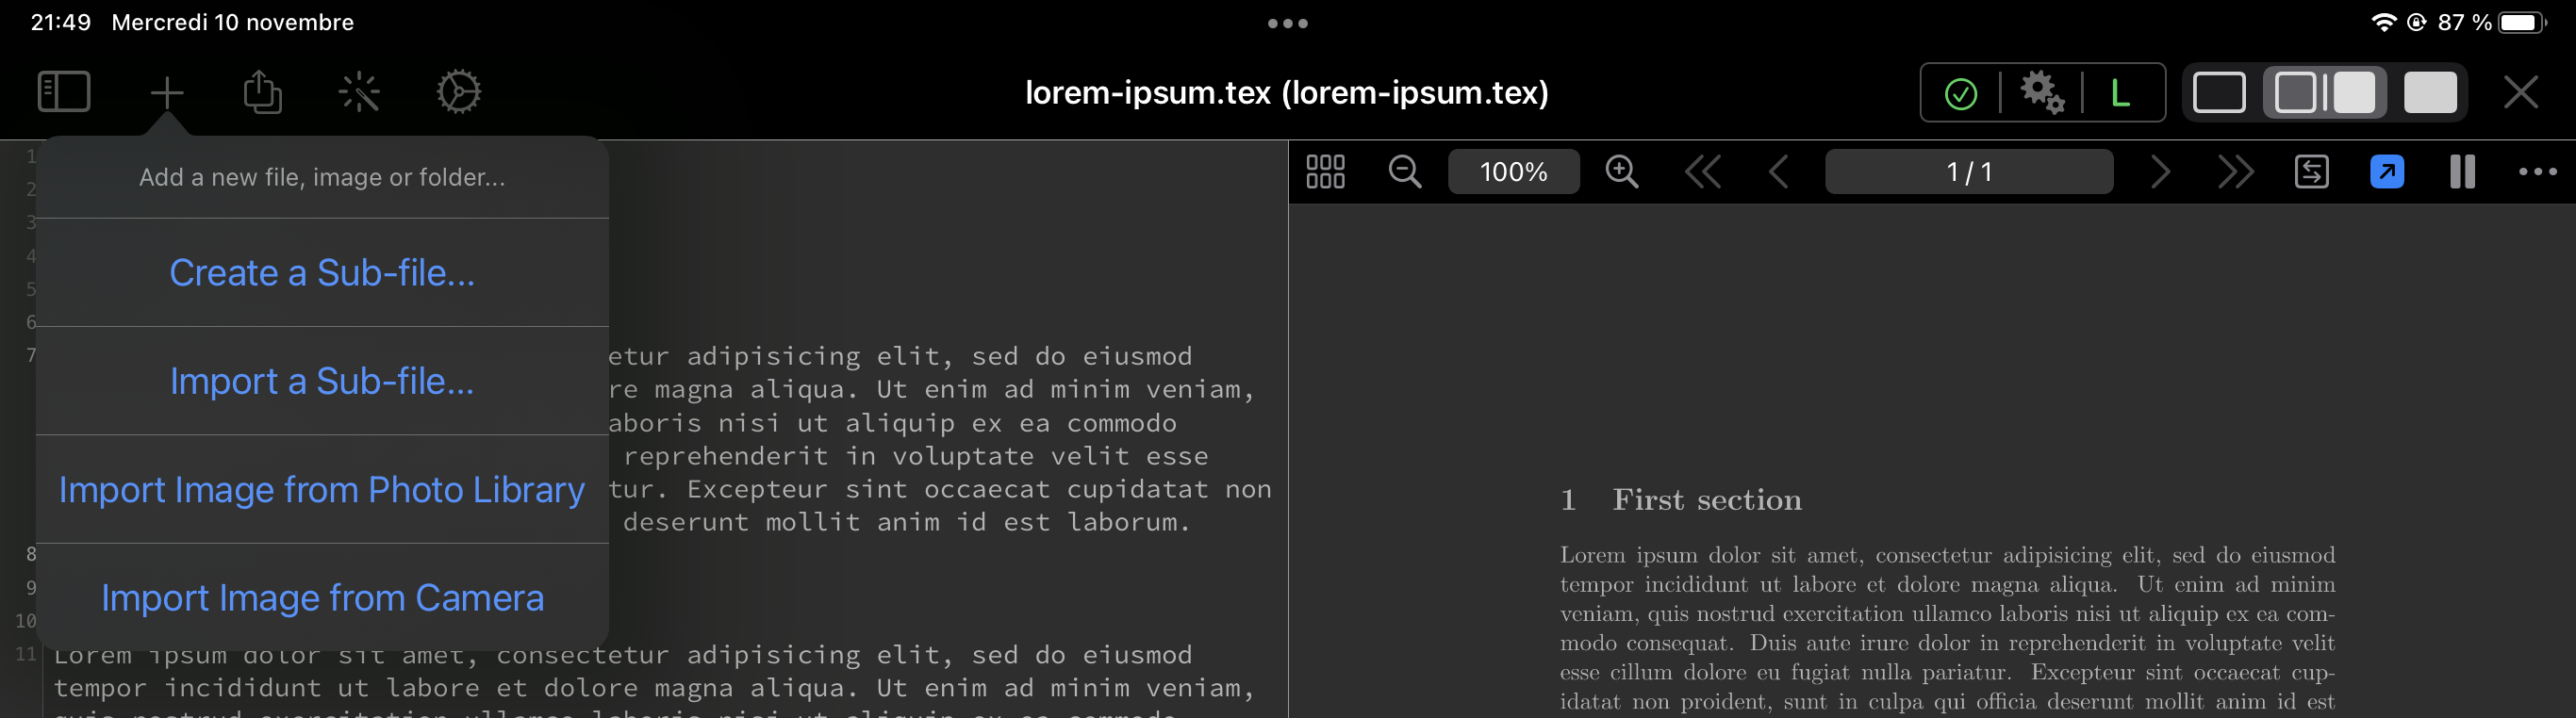
The images imported using the options or will be stored in a folder called Images in the parent folder of the root .tex file of the project. This is designed to avoid any conflicts with any existing files. If folder Images does not exist, it will be created before saving images to it.
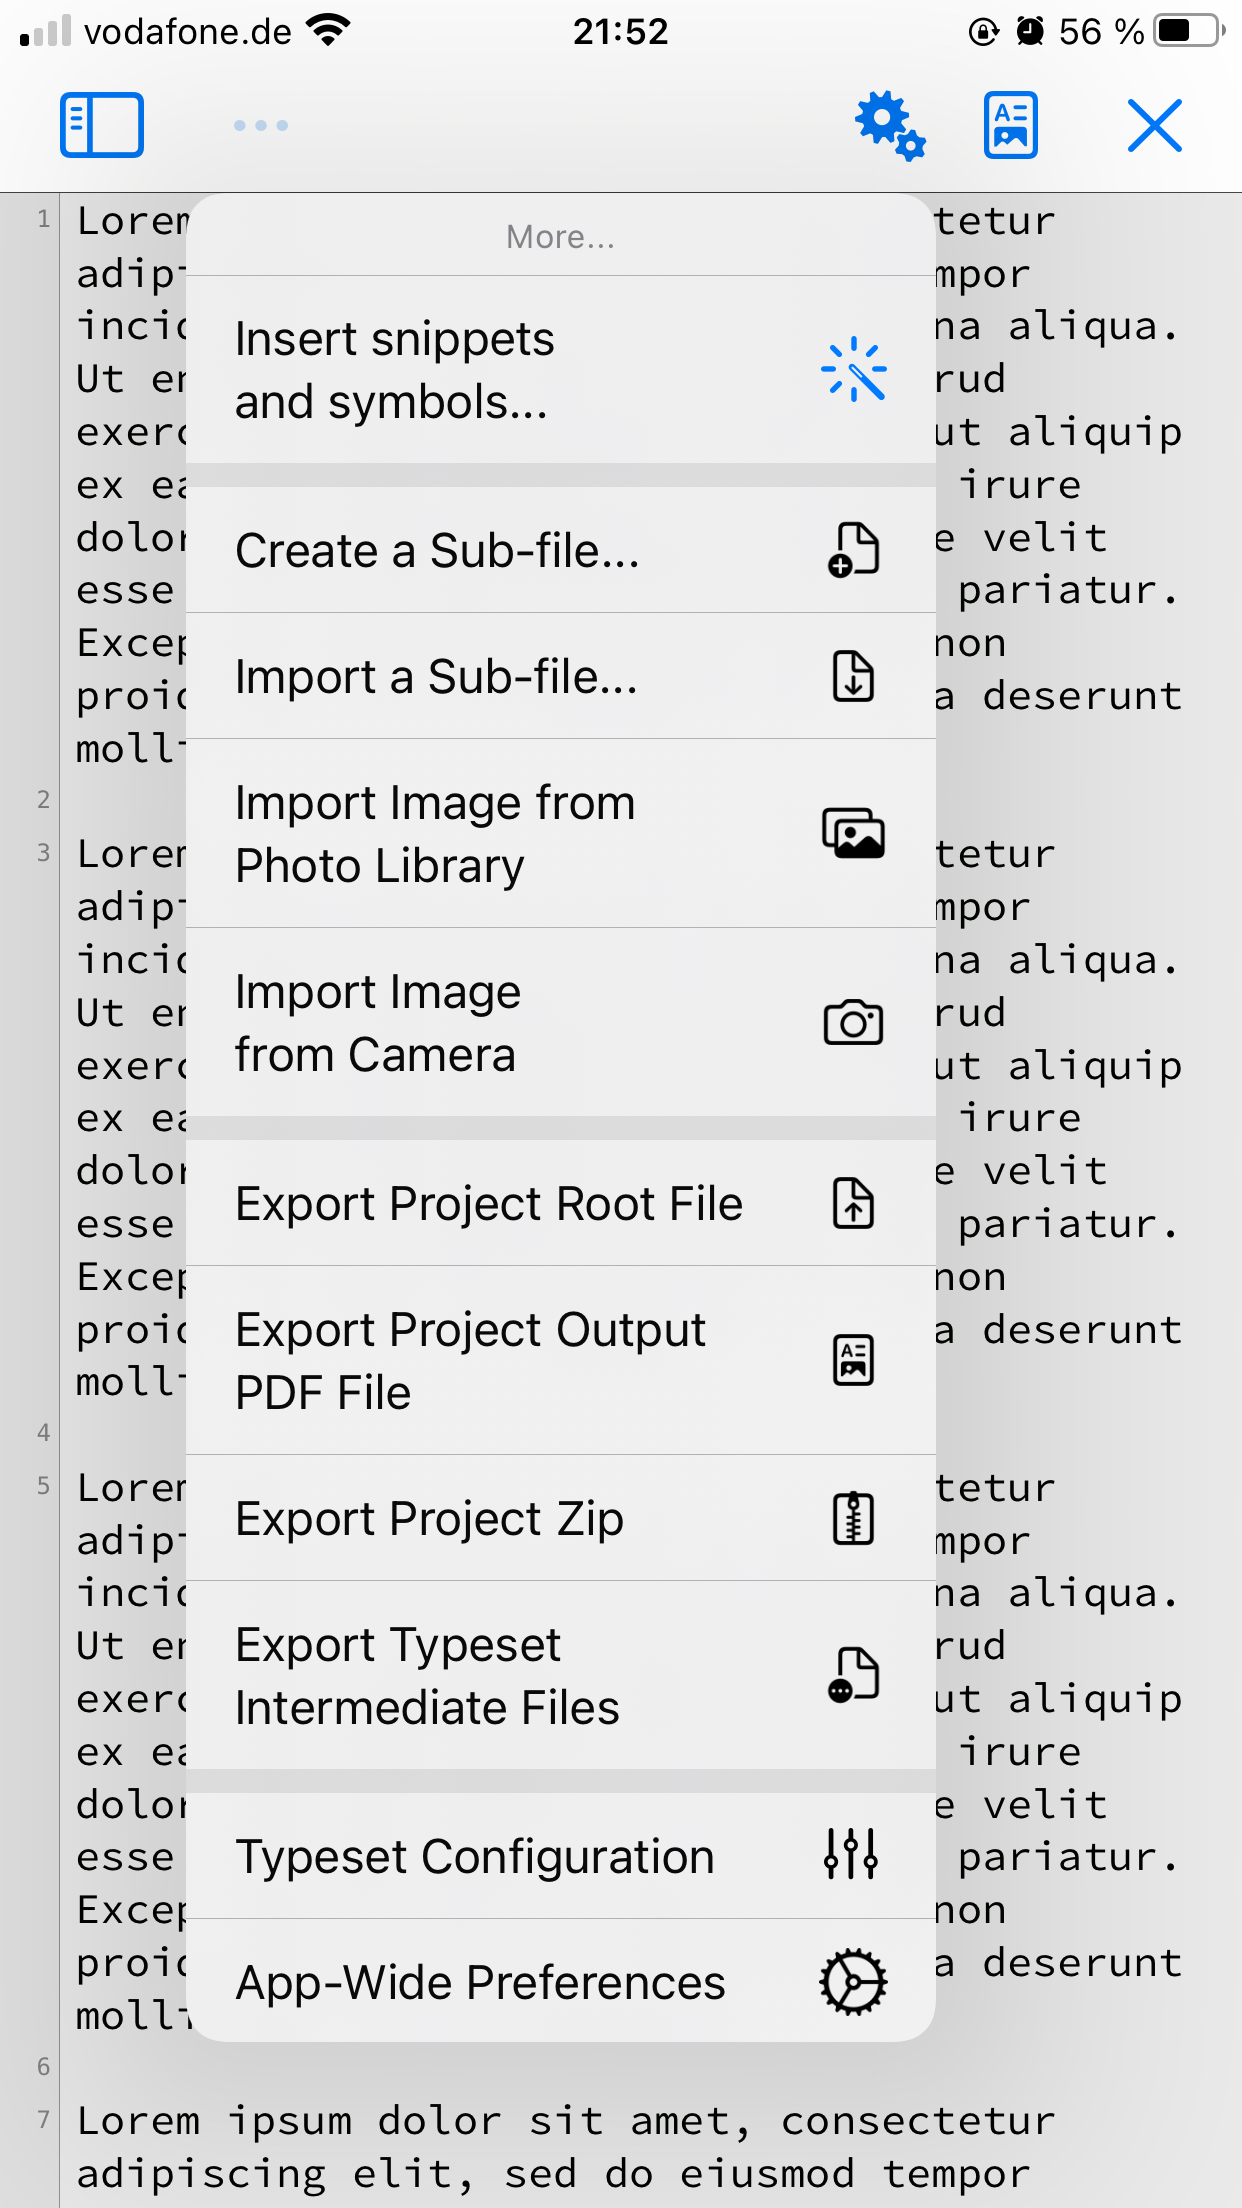
On iPhone, the import options are in the general menu as shown below,
Importing via Files app
Texifier’s local storage is visible in Files app as a folder named “Texifier” is described at apps/managing-documents/ios/exporting-files#1-accessing-texifier-files-via-files-app